Family Game Night

Playing games as a family is like eating dinner as a family. It strengthens your family. I know there are a lot of video games you can play as a family that are fun, too, but I'm talking about traditional games. Some games could be piece-less...like tag, hide and seek, bump in the dark, Ghost in the graveyard, etc. Other games could be sports based, like kickball or baseball. Or, they can be board games and card games.

Here are some of our favorite games that are great for young kids, besides the typical Candy Land, Chutes and Ladders, and Memory.

Slamwich

Monopoly Jr.

Sorry

Uno

Clue--We modify this one and put the people and the weapons in the rooms. Then we deal out 3 cards per person. The goal is to "collect" what cards you have. So if you have the candlestick, Col. Mustard, and the Library, you need to go to the Library, and to the rooms that have the candlestick and Col. Mustard on them. As you "collect" something, you remove it from the board (except for the rooms themselves), place it and the card aside, and then draw another card. The game is over when someone completes all their cards and there are no more to draw. The winner is the player who collected the most cards. It is fun!

Mancala

Blockus

My friend also recommends:

Pass the Pigs

Don't Spill the Beans

Yahtzee Jr.

If you're looking for a way to strengthen your family, or to enjoy your family more, or to help your children learn sportsmanship, or to help your children learn to take turns or how to count or about math or how to read, or to simply get your whole family engaged in the same non-technology activity for an hour, set aside one night a week for Family Game Night. Let's make a movement out of it!

Posted in Activities, All Writers, Cheri, Children, Family, Fun, Games, Learning, Relationships, The Moms | Tagged , , , , | 1 Comment

Glow-in-the-dark Bathtime!

Go from awesome Mom to Awesome-er Mom,
according to your kids,
with this simple idea.

Materials needed:
a kid
a warm bath
no lights
Glow sticks, neckalces, or bracelets


Turn the lights out and combine all ingredients and stir.
Let sit and play for as long as they want!
LOVE it!

4:30 PM. Where I live that means the sun is already down in the winter time. Put a snowstorm on top of that cuts the electricity and then wonder what YOU would do with 3 kids who don't like this situation. And that's how this idea was born.

Since then, we have had Glow-in-the-Dark baths LOTS of times! Without fail it changes mid-day grumpy blues into all smiles and giggles, and makes the "I don't WANT to take a bath" argument ancience history.

The smaller bracelets or straight glow sticks are really fun for "diving sticks", too, and I've also come across Submersible Lights at Michaels (and other craft stores). With a coupon, they end up being only a couple dollars for a pack of 4!

So keep your eyes out next time your out shopping. I can often find the glow sticks at craft stores year round, and the summer is a great time to stock up on them. Thankfully I had a stash to whip out in a situation like this!

Posted in Activities, All Writers, Fun, Kerri, The Moms | 1 Comment

Helping Children Learn to Read

little girl in a big book Charlotte's Web

Do your kids love getting lost in a book?

Like Janae, I have been asked many times what I have done to have my kids reading so early. Sure, I know kids who have read earlier. Ours have all been pretty secure before starting kindergarten. Usually I've just answered that we haven't really done anything. Across the years I've seen various programs for teaching young children and even infants how to read, and I haven't tried any of them. Maybe they are great, but life seemed too busy and there is too much pressure on kids and their moms already.

But as the years pass and another child of mine shows up for kindergarten reading already, we get the questions again, "What did you do?" In September I got an email from my 6-year-old's teacher explaining why she sent a 5th grade spelling packet home, instead of what the rest of the class got. "What's your secret?" she wrote. I've gradually gotten used to the idea that maybe we are doing something. It just didn't seem like it because they are just normal, every day things.

little girl in a big book If You Give A Mouse A CookieAs I am watching our fifth child, who is 3 1/2, reading a few words here and there, I have again been thinking about what is contributing to this family trait--and how to answer the next time someone asks me what we did. I've come up with some things that may be a part of it. I'm sure you already do many of them; there's nothing news breaking here.

First and foremost, because they love it, we read to our children starting when they are just a few months old. At least they enjoy looking, mouthing (not quite chewing), handling, and listening. There's always a little book in the diaper bag. I used to be better at taking time during the day to read to my kids, but it's gotten harder to find that time with each child. But at least they get a book read to them twice a day, at nap time and bedtime, until they don't take naps and they read to themselves each night. Well, we keep reading to them at night still, but it kind of fades out as they get older. I even have a book my 18-year-old and I are half way through and trying to read together, if we could ever carve the time out again. (See this post about reading with older children at Halloween.)

little girl reading a book to her doll

Another way we've seen the reading abilities of our children grow has been a natural by-product of reading the scriptures regularly out loud as a family. We each take turns reading a few verses. When we get to the pre-reader of the family, if they are willing, we tell them what their verse says, giving them a word or two or a whole phrase at a time, depending what they can handle, and they repeat it. Gradually, we start showing them the words we think they can read and eventually they are reading whole verses. Since we read from the King James version of the Bible, this has positive repercussions for years. For example, when studying Shakespeare in high school, the language is much easier to understand because of being accustomed to hearing the English language from this period in history.

stop sign

Children are eager to learn, and if you spend any time with them, you are in a position to teach. I think stop signs were what my children read first. They are conveniently placed all around town, you stop at them, they are bright red, the letters are clear, and there are only four letters. Take advantage of them. Point them out while driving or walking. Respond enthusiastically when they point one out. Sound out the word repeatedly, making sure each letter is heard. After you pass the sign, ask them what "STOP" begins with or to spell it. They are learning much more than just how to read that one word. Just the concept that these lines have meaning and you can learn to make sense of them is a big thing to wrap your head around. And the fact that you, who they look to for everything, think it's worth noticing means a lot, too.

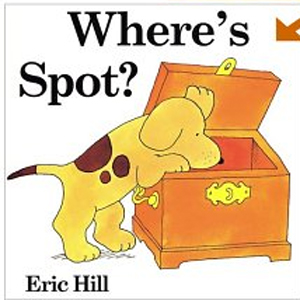
Respond to their interest in learning. Point things out. Do they ask you to read the same book over and over? Start pointing out a simple, repeated word, and when you think they are ready, have them read that word each time you come to it. They've seen the pictures plenty of times--point to the words you are reading so they can follow along if they like. Even if they don't read any of it, they will realize that you are reading the words, not just telling about the pictures. Our kids always loved the Spot books by Eric Hill and were particularly interested in the words behind the flaps. I like the large, clear, simple text.

Spot books by Eric Hill

Books without words are good, too. Because they don't have words, they allow you and your child to develop powers of observation and other skills of understanding. One of my favorites is The Bear and the Fly. Here's an article I read recently that motivated me to find more books without words.

the bear and the fly by paula winter a book without words

Have words and letters around. The more your child sees words, the more they will internalize them. Alphabet magnets on the fridge, learning toys, videos, their name on their bedroom wall, labels on toy bins, frequent exposure. My Mom taught kindergarten and 2nd grade for years, and it seems normal to me to have a chalkboard (and chalk) in the basement and posters from the local teacher's store on our walls.

girl jumping on bed while reading a rhyming words poster

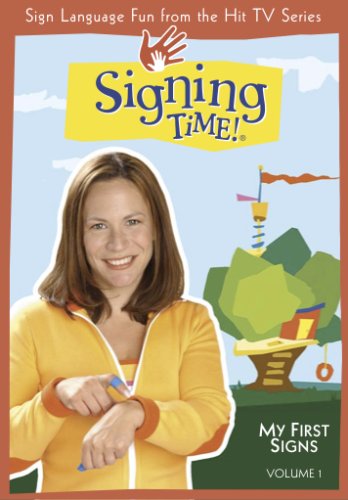
Consider learning a little sign language. Reading is connected to language skills, and our younger kids that learned a little sign language as babies seemed to have a head start with words. My youngest was barely two when I realized she was reading the word "no" painted on a parking lot wall because she had seen it several times on a Signing Time video. These videos are not only geared for children and entertain with great songs while they teach, but they also show the text on screen while saying and signing basic words.

signing time

Have books around. I heard this bit of advice when my first child was small, and so I created a reading place in each part of the house--the basement, the family room, the front room (where the nicer books go), and their bedroom. Wherever they spend time, there is a book within reach (as well as a place to put books away).

Read yourself so your children see that you enjoy reading. You've heard this before I'm sure. Honestly, I don't know how much this has influenced my small children. Probably not directly, as it seems pointless for me to try to pick up my own book and read it when they are around. When I had my first young children, I was lucky to squeeze a book in a year for myself. Eventually I decided I couldn't wait for my kids to grow up for me to read more, and I manage to get books in by listening to them when I walk, in the car (when the kids aren't with me--if they are there we are listening to their music or their recorded book), and a couple pages before I drop off at night. Perhaps even the desire to read affects how a parent deals with books in their home and for their children. Maybe the most significant benefit to having a parent who reads is that good books influence us to be better people, better parents. (And they can give us a needed escape from the insanity, too.)

young boy reading a book in a chair

Use the library. Though I'm sure story time at the library is valuable, as a parent, I never hit it off with story time. It was just too hard to get there--it worked better for us to just read together at home. If you manage to do it, more power to you. All of these ideas are just things to choose from anyway--no one can do it all.

Still, we go to the library regularly. We do the reading club in the summer. We go online and reserve materials. We pay late fees, but it still seems like a bargain for all the library does for us. Lately I have been taking my youngest once a week to choose an Emergent Reader book, just the level A. I read it to her the first day at nap time, and the next day she reads part of each page. I tell her, "You read me a book, and then I'll read you one." She reads it to me each day until we go back to the library to pick out a new one (or four). I know this is borderline of teaching reading in an organized way, which I claimed I don't do, but really it's just been following her lead and providing materials she is eager to use. It's so much fun to see her learn!

Make books special. Give nice copies as gifts. Reward accomplishments with "book points" that can be used to buy books from the Scholastic Book order that comes home from school. I have a few magazine boxes that I decorated for different holidays that hold holiday books, and I pull those out for that holiday. My sister-in-law started a Mother and Son Neighborhood Book Club that has been a great success for years. I bet you're doing some great things that you're not even aware of.

Take advantage of the opportunities that arise, the ideas you have, and run with it.

Posted in Children, Learning, Sunny | Tagged , , , , , , , , , , , , , , , , | Leave a comment

Save the Socks!

For years now, I've been baffled by one single phenomenon...the case of the lost socks. Week after week I set aside a pile of socks who have sadly lost their mate in yet another tragic laundry day disaster. I don't know where the socks go. I always assume that, with time, they'll show up. But, alas, my pile grows larger and far too often, their mates never come back.

Well, last week, I had an idea that I think will save the socks. I pass it on to you so you, too can end the madness in your house (since I'm assuming that there are lots of us suffering from this same loss). I went to the store and bought lingerie laundry bags for less than a dollar each. Then, I hung one up in each bedroom by the kids' laundry baskets. The kids put dirty socks in their bags and dirty clothes in the basket. Now, on laundry day, I just throw in the bags with the laundry and so far, not a single sock has lost their mate!

So today I invite you to join me in my campaign to "Save the Socks". If nothing more, it will at least buy you back a bucket, a shelf, or a box that is currently housing your collection of lonely socks.

Posted in Family, Janae, Laundry, Organization, Organization, The House, The Moms | Tagged , , , , , | Leave a comment

“Stick To It” Goal Book Giveaway Winner!

Through our extremely random entry picker, the winner of the giveaway for the "Stick To It" Goal Book has been chosen!

choosing our giveaway winner

Drum roll please . . . and . . . congratulations to

giveaway winner M for Mary

Mary!

You will be receiving your book shortly. Now you better use it, or we might as well give it to someone else!

To everyone else, really, it's a fun craft and the hard part has already been done for you. Go outside and find yourself a stick and make your own. It can be your goal for this month.

Posted in Crafts, For You, Goals, Sunny | Tagged , , , | Leave a comment

Seize the Day–Live in the NOW

How many times in a day do you hear your kids say “In a minute!” or “I will!” or “just a sec!”? How does it make you feel? Frustrated? Annoyed? Angry?

My girls have been listening to a wonderful series of CDs called “Standin’ Tall” that focuses on 12 different values, including honesty, forgiveness, gratitude, love, service, among many others. One of their favorites is “Dependability”. In this story, they learn about what it means to be dependable, as well as what happens when you are NOT dependable. One of the songs on the CD is called “In a Minute.” The first verse goes like this:

“In a minute, in a while, I will do it with a smile. Just a second, I’ll get to it. When the commercial comes, I’ll jump right up and do it. Not right now; I’m too tired. But tomorrow I’ll be inspired. Then I’ll do it, never fear it. That sounds easy, ’cause tomorrow isn’t here yet.”

Hearing this CD over and over and over has made me think. How many times in a day do your kids hear you say “In a minute!” or “I will!” or “just a sec!”? I know for my kids, they hear it several times a day. What could I possibly be doing that is so much more important than my kids? I’m not saying I should be playing with them every second of the day, but when they are SO excited to show me something and yell down the stairs “Mom! Come see what I did!” how sad is it when I respond with “In a minute!”

My goal for this month is to live more in the moment with my kids. To experience their joys and excitements when they ask me to, to put down what I am doing (which usually isn’t that important) and share in that joy and excitement. I know that the day is not far distant when they might stop asking me to be apart of their play, their excitement. My chance to “do it tomorrow” will be gone. So, as long as they want my kisses, my cheers, my snuggles, I plan on giving it to them. Today.

Posted in All Writers, Challenges, Cheri, Children, Family, Finding a Balance, For You, Goals, Love, Relationships, The Moms | Tagged , , , | 2 Comments

Saving the Back of Trampoline Owners

I'm hoping this will apply to those who don't live in Denver. But, I know it'll help out those who live nearby. Here in Denver, our winters are beautiful. We get snow, but it only lasts for a few days before warmer weather comes, melting the snow and making outside play enjoyable.

Last year, we got a trampoline for Christmas. Unable to imagine making the kids wait until summer to enjoy their gift, we set it up on Christmas day. They loved it. But, a week later, the snow came. Should we take it down? Since that's an ordeal in and of itself, we opted to leave it up and simply sweep the snow off. What a task! It took forever and left our backs aching, but the weather warmed up and the kids were back on the tramp for a couple of weeks before we did it again. As we watched them play, we convinced ourselves it was worth it.

This year has been gorgeous. We just had our second snow storm and between storms temperatures have been in the 60s. We're so glad we left the tramp up. It beats taking it down and the kids still play on it. But, we finally learned how to save our backs and our time.

Supplies needed: A tarp. Yep, it's that simple. Buy the biggest tarp you can find for the size of your tramp. Place it on the tramp when you snow is coming. The snow will fill the tarp.

When the snow has stopped, simply, drag the tarp off of the tramp. Have a net? No problem. Just fold in the edges as best you can and pull the tarp through the opening. It will create a funnel type shape that will allow the snow to pour right off as you pull it out. It took me all of five minutes to clear the tramp today and no back pain!

So, if you're like me and you'd rather keep the tramp up, then go buy a cheap tarp from Walmart and save yourself a trip to the chiropractor! Happy Jumping!

Posted in All Writers, Cleaning Tips, Janae, Organization, The House, The Moms | Tagged , , , , | Leave a comment

Cook Now, Eat Later: Freezer Meal Plan Week 5 (The Finale)

Welcome back! Today is our last installment of "Cook Now, Eat Later", at least for the time being. This week, we're using ground beef to make meatloaf muffins, meat for Navajo tacos, Sloppy Joes, and then browned ground beef to freeze.

I would buy two large packages of ground beef from Sam's Club for this week. You'll need two CrockPots (or do it in two batches), a large skillet or wok, and muffin tins.

Take one package and split it in half. Place one half in each of the CrockPots. In one CrockPot, add the ingredients for the Navajo taco meat and mix well. In the other, add the ingredients for Sloppy Joes and mix well. Turn the CrockPots on LOW and let cook 4-6 hours. Once they are done, allow to cool enough to fill bags. Fill quart sized freezer bags with 3-4 cups each, label, and lay flat to freeze. To serve, thaw, heat, and serve Sloppy Joes on buns and Navajo taco meat over fry bread (recipe follows), topped with lettuce, tomatoes, cheese, olives, sour cream, etc.

NAVAJO TACO MEAT

  • 2 lbs. ground beef
  • 1 7-oz. can diced green chiles, undrained
  • 1 large can pinto beans
  • 2 tsp garlic salt
  • 1 tsp cumin
  • 1/2 tsp chili powder
  • 1/2 tsp onion powder
  • 1/2 cup water

Combine ingredients in CrockPot. Mix well. Cook on low for 4-6 hours. Serve over fry bread (recipe follows), topped with lettuce, tomatoes, cheese, olives, sour cream, etc.

FRY BREAD

2 cups flour
1 Tbs baking powder
1 tsp salt
1 cup milk
Oil for frying

Stir together flour, baking powder, and salt. Stir in milk, mixing until the dough comes together. Add more flour if necessary to handle the dough. On a floured surface, knead the dough until smooth, at least 5 minutes. Let dough rest for 5 minutes. Heat oil in a large, deep skillet to 365°F. Oil should be about 1 ½ inches deep. Bread off ¾ cup sized pieces of dough, and shape into round discs ¼ inch in thickness, making a depressed area in the center. Fry breads in hot oil until golden on both sides, turning only once. Drain on paper towels.

SLOPPY JOES

2 lbs hamburger
1 Tbs Worcestershire sauce
4 Tbs mustard
1 small green pepper, diced (optional)
1 can tomato sauce
4 Tbs brown sugar
2 medium onions
1 tsp salt
¾ cup ketchup

Combine all ingredients and cook on low 4-6 hours. Serve on buns.

With your other package of meat, divide it into thirds. One third is for the meatloaf muffins and the other two thirds are for plain ground beef. For the meatloaf muffins, we're going to simply put together a recipe for meatloaf, but instead of shaping it as a loaf, we're going to fill the muffin tins with the mixture. No, you do not HAVE to make muffins out of it. But the reason I like to is because we all really like the edges of the meatloaf best and with muffins, you get more edges. Also, it's a great way to freeze them. They are in individual portions so you can just take out how much you need for a meal and cut down completely on the leftovers and/or waste. Do not grease your pans...you'll have plenty of grease as it. When the muffins are done baking, remove from pan quickly and let drain either on a napkin or a wire rack. You may want to place a baking sheet under the muffin tin during the last 10 minutes of baking to prevent any spillage.

You can use this recipe, or any favorite meatloaf recipe.

BROWN SUGAR MEATLOAF

¼ cup barbecue sauce
¾ cup packed brown sugar
½ cup ketchup
1 ½ lbs ground beef
¾ cup milk
2 eggs
1 ½ tsp salt
¼ tsp pepper
1 small onion, diced
¼ tsp ginger
¾ cup crushed breadcrumbs

Mix together ingredients. Combine well. Shape into a balls and place in muffin tins. Spread the rest of the barbecue sauce mixture on top. To freeze, simply place muffin tins in freezer for 24 hours. Pop out frozen muffins with a knife. Place in gallon size ziplock bag. To bake, place frozen muffins in muffin tin and place in a cold oven. Turn the oven on to 350 degrees and cook for 45 minutes (from the time the oven is turned on) or until done.

For the browned ground beef, heat a large skillet or wok. Once hot, add portions of the ground beef and stir to brown. If you would like, add some diced onion so you don't have to later. Drain the fat between cooking sessions. I like to transfer the cooked meat from the wok to a strainer to get the rest of the fat drained off. Then fill quart size bags with 2-3 cups of beef, label, and lay flat to freeze. The great thing about ground beef is that if you don't pack the bag too full, you can simply break off the amount you need instead of defrosting the whole bag. Use your pre-browned ground beef for quick tacos, spaghetti, stroganoff, or anything else you use ground beef in.

I hope you've found either some inspiration or some helpful recipes to cook now and eat later!

Posted in All Writers, Budgeting, Cheri, Cooking Tips and Tricks, Family, Food, For You, Goals, Money Saving Tips, Organization, Recipes, The House, The Moms | Tagged , , , , , , | Leave a comment

Organizing Tip — Cluttered Cords

Yesterday was "Get the house organized" day. LOVED it. Unfortunately, much of what we got accomplished was more behind the scenes work, like closets and hidden cluttered drawers. So, not much to show if you stopped by, but we are all feeling better. One of my favorite things we did to organize our home was this:

Bread Tags work wonders to help organize cords. I use this with my surge protectors by the TV and by our computer. It was so fun, I'm looking for even more things to label.

Posted in All Writers, Kerri, Organization, The House, The Moms | Tagged , , | Leave a comment

“Stick To It” Mini Goal Book Craft
plus free printable and a giveaway

Have you made your goals for the New Year already? Are you serious about them? How many times have you been told that if you are going to stick to your goals, you have to actually write them down--not just think them up?

stick to it book craft for tracking goals for 1 year

Here's a place to write them down.

little goal book title page stick to it

A cute little book to make for yourself and perhaps a few friends or family members as well (if you're going to make one, you might as well do a few--or make them together). Or, comment in this post that you would like one, and I will choose at random someone to mail one to! (I will be able to see your email address to contact you, but no one else will.)

stick to it goal book January page

It has a blank page for each month, so that you can revisit and adjust your goals as the year progresses.

poem in the stick to it goal book

It also has in it one of my favorite poems about keeping goals. (Favorite because while I have a hard time remembering things nowadays, the first few lines stick in my head and remind me of what I need to to!)

Stick to your task 'til it sticks to you;
Beginners are many, but enders are few.
Honor, power, place and praise
Will come, in time, to the one who stays.
Stick to your task 'til it sticks to you;
Bend at it, sweat at it, smile at it too;
For out of the bend and the sweat and the smile
Will come life's victories after awhile.

(from Favorite Quotations from the Collection of Thomas S. Monson)

materials for making the stick to it goal book

Materials for each book:
my handy dandy printable which takes 2 pieces of 8 1/2 x 11 paper (I chose an ivory color)
cover paper--one 8 1/2 x 11 sheet will be enough for 4 books.
a narrow stick 4" long
a rubber band, about (?)" long

Tools:
scizzors
printer (b&w is fine)

Instructions

The first step is to print the Stick To It book file. You will need to print it double sided so page 2 (May, January, July, March) is on the back of page 1 (poem, October, December, August) and page 4 is on the back of page 3. Some printers will let you print the odd pages only. You can then turn the pages over and feed them back through your printer and print the even pages only.

tearing pages of the stick to it goal book

Cut your pages along the lines indicated, or you can crease them a few times in both directions to weaken the paper and carefully tear them for a more vintage book look.

assembling the pages of the stick to it book

Then fold them each in half (you'll also find instructions in the margin of the printable) and assemble them in order. The title page is first, the poem, and then the months in order. There are a couple of extra blank pages at the end.

putting cover on the stick to it goal book

Cut your cover paper about 3 3/4" x 5 1/2". Add it to your pages.

cutting notches in the stick to it goal book

Use scissors to cut 2 notches into the folded side of the book about 3/4 " from the ends. If it's too hard to get through all of the pages (and it probably is), try it first to mark where the notch is, then remove some of the inside pages, cut the notches, and replace them in the book.

threading rubber band into the stick to it book

Open the book to reveal the hole and thread the rubber band into one of the notches.

place stick in rubber band loop for stick to it book

Place your stick through the rubber band on the outside of the book and pull it tight.

thread rubber band through other hole of stick to it book

Take the end of the rubber band that is now inside the book and thread it through the other hole. This part can take a few tries, and you may need to find a pencil or something to help you poke the rubber band through.

loop rubber band over the other end of stick for stick to it goal book

Now loop it over the other end of the stick. If it is too loose, you will have to find a smaller rubber band, a thicker stick or put your notches further apart (probably too late for that, though!) If you have the right size rubber band, your little book will have a tight, sturdy binding.

Done! Except, of course, you still need to write down your first goal. Again, if you would like me to send you one, enter the random drawing by commenting on this post. Giveaway closes next Monday, January 9th 2012.

Happy New Year!

Posted in Crafts, Goals, New Years, Sunny | Tagged , , , , , , , , , | 3 Comments