I know we’re all supposed to be eating whole grains and eliminating enriched flours from our diets, or whatever. But there is nothing quite like homemade white bread just out of the oven. The smell fills your home and I think it is an unspoken rule that you have to have at least one piece as soon is it comes out. But who can stop at one? Our rule is that we eat one LOAF as soon as it comes out, rather than stopping at one piece.
My mom made homemade bread practically every day (it seemed) when I was growing up. With seven kids in our family, we went thru quite a bit of bread. I loved my mom’s bread. But it required either potato flakes (which I don’t keep on hand) or a baked potato. Either way, it wasn’t convenient for me. When I got older and started making my own bread, I became particular about the breads I would make. I wanted a bread that turned out every time. I wanted a bread that would stay soft for a few days rather than going crumby the next day. I wanted a bread that was easy to make. So I searched for recipes and tried a bunch of different ones.
One day, I came across a recipe and started modifying it. Finally, I found the perfect combinations and make this bread as often as possible. It is simple to do, but I guess if you’ve never made bread before, there are a few tricks of the trade.
WHITE BREAD
- 2 cups hot water
- ¼ cup sugar
- 4 ½ tsp yeast
- ½ cup oil
- 1 Tbs salt
- 5-6 cups bread flour
- 3 Tbs gluten
To start, combine the water and sugar in a large mixing bowl or the bowl for a stand-up electric mixer. I use a Kitchen-Aid and love it. The water can be fairly hot because once it hits that bowl, its going to cool. I have used water as hot as I would want to take a bath in (which is pretty hot) and I’ve never had problems. You just don’t want to kill your yeast. But using water that isn’t hot enough will result in S..L..O..W.. rising.
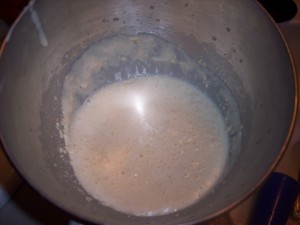 Anyway, combine your water and sugar and sprinkle in your yeast. Stir to incorporate the yeast and let it sit. I love watching the yeast come alive and make the whole thing so foamy and bubbly, but that’s just me. Once it is pretty foamy and froathy, add the oil and salt. Mix it together a little and then add about 4 cups of flour and the gluten.
If you’ve never used gluten before, it is a fine powder, like flour, that is used to give extra elasticity to your bread. Sure, you can make this recipe without it, but it will be SO much better with it. And the flour I use is bread flour, which is regular flour with extra gluten. All white flours have gluten in them naturally, but bread flour has extra which results in a softer texture and, like the gluten, more elasticity. Once you make bread with bread flour, you just may never go back.
So add the 4 cups of flour and the gluten and start mixing to create a soft dough. You will need to add more flour, 1/2 cup at a time, kneading it in for two minutes or so, until your dough leaves the sides of the bowl, but NOT the bottom! It should hug the kneading attachment (for a Kitchen-Aid) but if it leaves the bottom of the bowl, you’ve added too much flour. No, your bread will not be ruined. It will still be delicious. But if you are really careful and watch it, it will be amazing.
What you’re looking for is bread that is soft to the touch but not really sticky. You should be able to squeeze it and it should be as soft as a baby’s behind. Well, softer, but I just love kissably-soft baby’s behinds, don’t you?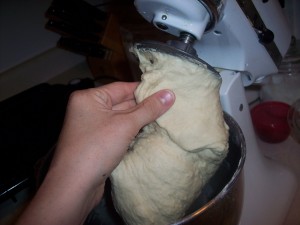
See? It’s still pretty stuck to the top of the attachment, but its not getting all over my hands. Once your bread is ready, you can either just cover it and leave it in the mixing bowl, or you can transfer it to a slightly greased bowl, turning once to coat, and cover with a towel. I have found that it really doesn’t matter which way you do it, though it may be a little more stuck to the bowl if you don’t grease it. Not like that’s a big deal, though.
Let the dought rise until about double in size. 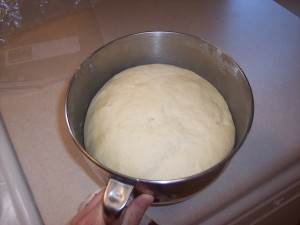
You’ll know it is ready when it is a) double in size and b) indentations stay after you poke the dough with your fingers.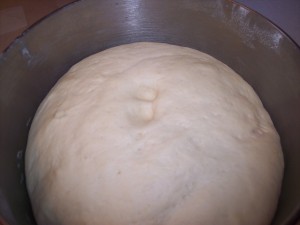
Punch the dough down and shape into loaves. Place each loaf in a bread pan. This recipe yields 3 regular size loaves for me. I always like to score the center of my loaves with a serated knife so they rise evenly. It is not necessary, but is for aesthetic purposes only. 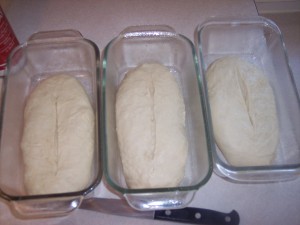
See? The dough was a little sticky, so my loaves aren’t necessarily pretty, but once they rise…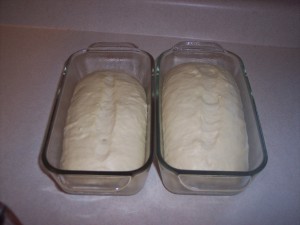
…they look a lot better. Then bake in a 325 degree preheated oven for 40 minutes or until all sides are golden brown. Remove from pans immediately and cool on a wire rack.
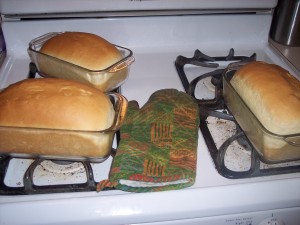 I dare you to see how long you can go without having a slice…or maybe a whole loaf.


Pingback: Homemade 100% Whole Wheat Bread | Five Real Moms
I made this recipe yesterday, and it turned out great. I’ve never had bread work before! Our taste buds thank you, Cheri!
Awesome – I’ve always been nervous about the idea of making my own bread, but this recipe looks really good and actually doable! Thanks.