You and I, we have a common problem.
Let's admit it...we both have crayon nubs littering our art bins that we keep pushing aside for the bigger, better versions of themselves.
Well, my kids and I decided to do something about it. We reinvented the wheel, or...uh...our crayons.
First, we sorted all our crayons to find all the nubs and removed their paper.

Next we sorted them into the colors of crayons we wanted. We kept some true to color, and made 4 crazy rainbow ones, putting some of each color in 4 piles. We put all these into muffin tins. (Non sprayed, non treated. We used silicon and metal, and while both worked fine, the ones in the metal tins came out a tinsy bit easier, and the silicon was harder to clean. Just note to self.)

Meanwhile, we had preheated the oven to 350, so when our crayon piles were ready we put them in the oven then turned the heat off to let the crayons melt. We kept our eyes on them, and when they turned a bit soupy (15 minutes or so) we took them out...

...And immediately placed them in the freezer. When they were completely cooled, we turned them upside down and out they fell! (Another note to self: do it over a towel to cushion their fall...otherwise they will crack) And TA DA! Our new amazing recycled crayons!

If you liked this post, you might also like:
 Free Babysitting
Over the years I've found that one of my hardest challenges during the school year is finding babysitters during the day for my younger kids. My regular sitters are, of course, in school themselves and I feel bad always asking my friends to take my kids. ... All Stuffed Up with Nowhere to Go...
'Tis the season for illnesses and stuffy noses. Has your infant or toddler ever woken up in the night, gasping for breath because they can't breathe thru their nose? Or is your child like mine and sleeps sucking her thumb? When her nose gets all stuffed...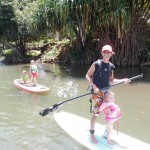 Pulling a Big Load
Aloha! My name is Heidi and I live on the North Shore of Oahu, Hawaii. I have three young girls and a husband who makes me laugh. We love to turn up the music and dance in the livingroom, bend down and smell fresh grass, and play at the beach in the...